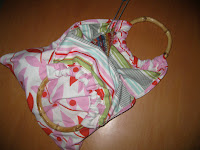
I am so behind on posting projects. It seems like I am always working on something, but can't seem to get the camera out and snap a few shots. I have a list of things that I need to take photos of. Anyway, here is a tutorial for a bag organizer. The handbag that I have now is really deep and I am always searching for something. I tried one of these a while ago, but didn't seem to get it right. I tried again after getting frustrated trying to find my wallet!
Fairly simple project:
So, I started by folding my fabric so it had a 2 folds; one taller at the back, and a shorter one in the front. This is all one piece of fabric, just kind of accordion folded.
Then, I cut the material and took the long piece from the back of the folds and brought it to the front, so it was inside out. Sewed around the edge, leaving an opening to turn. Turned right way, ironed, top stitched.
Lastly, I sewed pockets to hold all the gear in my purse: phone, wallet, pens, card holder.
And that fabric? Ancient! But this was the mock up. Since it worked, I can pull out some decent stuff. Then again...who sees the inside of your purse and 90's fabric?
Thursday, November 18, 2010
Friday, September 24, 2010
Losing Weight with a Lisp
I got fitted for my mouth guard yesterday. This might be the best way to drop a few pounds. And I talk funny.
Sunday, September 19, 2010
Summer in Norway
This year, our summer vacation took us to Norway. Mark really wanted to see the fjords. I, not knowing what to expect, was along for the ride. It wasn't high on my to see list. We started out of Dover, England, which was like a coming home for us. And we did cross on the ferry. Something I said I would never do again. I really didn't remember Dover being so depressed. It is such a run down town. We took the boys to see the white cliffs, shopped at Tesco, and had a great steak and ale pie. So, it wasn't all bad. Then, we boarded our ship, and headed for Norway. Here are some pictures of the trip. The weather did not cooperate. We left 90 degree weather, only to vacation in dreary, drizzly weather. But the sights were spectacular.....
This was in Molde; it was our 12 year anniversary and we hiked up this mountain. (I think that's the ship in the background.) When we honeymooned in Tahiti, we biked around the island and I complained the entire time. Not much has changed in 12 years.
Taken from the train up a fjord in Flam. The train kept breaking down, so we went up 3/4 of the way, then came back down. It was just fine with us. They refunded our ticket money (did I mention everything in Norway is really, really expensive?) and there wasn't anything to see at the top. The greatest part were sights on the way up.
Tuesday, August 3, 2010
Week 25
A while ago I bought some fabric and ribbon with the intention of making a skirt from it. I finally made one.
I took a favorite H&M skirt, (I have one in every color--Mark calls it the summer 'uniform') and put it on the fabric. I just cut (gasp... no measuring!) around the H&M skirt giving a little extra for seam allowance. I stitched up the sides, used fold over elastic for the top and hemmed the bottom. All very easy. Then, it needed something. Since it was the color of scrubs, it really needed some oomph. So, I played around with the ribbon that I bought for it. Couldn't figure out what to do with it; edge the bottom, a swirl on the front; down the sides? I ended up scrapping the ribbon thing after remembering a Boden skirt!
Here is the inspiration skirt....Here is what I ended up with.
Thursday, July 1, 2010
Week 24
While O was napping this afternoon, I made this little number. I have been wanting a clothespin holder for a while, but was really unsure how to do it. I had some Laura Ashley fabric from a looonng time ago. (Like when we were living in the UK, there was a LA store nearby. They had some great deals on fabric!) I wasn't sure how it would turn out, so I didn't use fabric I loved...just in case. Now that I figured it out, I think I might try one in different fabrics. This should do the trick to keep the clothespins handy.
Week 23
Freeze Pop Holder
Tired of wrapping paper towels around ice pops to keep little hands clean and warm? I stitched these up in a jiffy yesterday. I used fleece from another project; cut strips 2.5" x 10", folded in half and stitched using a zig zag stitch around the edges. I made enough for when the whole M'bach gang is here.
Here is O with a demo of how to use it. After a nap, he was a sweaty mess.
Tuesday, June 29, 2010
Week 22
I purchased this Heather Bailey Nicey Jane fabric a while back. I bought a few fat quarters. For some reason I was on a pink kick (usually not me). But I really fell for this fabric. I wasn't sure what to do with it though. I found an old bag at the thrift shop (sadly, where I find most stuff around here) and took off the bamboo handles. So, I looked around for a bag pattern or tutorial I could use. I knew I didn't want a tote type bag. It would just collect just at the bottom of my closet. I can't find the tutorial that I used though. I remember it was for only a single sided and I wanted something reversible or lined. This pattern worked out well and it can be reversed! I took it on our cruise and kept my knitting in it. Perfect size to walk around with and I could wear it on my arm, to boot!
Week 21
I whipped this little gem up the other day before heading to the grocery store. I had a fist full of coupons (and how do you say that...'q-pon' or 'koo-pon'?) and they were just on the bottom of my purse. I made this the same way as I did the punch card holder, just a big bigger. I love the fabric, too! I purchased the matroyshka from a fabric market that travels around Germany and the Netherlands. The inside is the same fabric as the skirt from a few weeks ago.
Now, a place for all those coupons....and a (fairly) neat purse!
Monday, June 28, 2010
Week 20
Happy Father's Day! Yeah, a little late. Every year, the boys make a t-shirt for Mark. I'm running out of ideas. We have already done footprints and We love you from the bottom of our 'soles', We lava you, Dad (with hand print lava; Henry was really into volcanoes that year), Dad, you rock and roll (with a bike and guitar on it; big into biking and Guitar Hero that year), as well as handprints and stuff. I have to admit, I was sweating it out this year. Really did not know where to go with it. Mark got a new car, so we used that as a starting point. Picture of kids, car combined with iron on paper that you run through the printer...voila!
Wednesday, June 23, 2010
Week 17, 18, 19
So, here are a few of the projects that have gone out in the mail recently. (Mom...stop reading and looking now.) I know she won't. We are both terrible at keeping presents a secret. Here goes...
Pin
This pin was made with different scraps of fabric. I found the tutorial here. I love this woman and her blog! The colors she uses in her quilts and throughout her house. Ahhhh...love it! Back to the pin. I did another after this one in more pinks, but this one turned out far better. I think it was because of the ruffle technique.
Apron
This apron I have made many times. I made them for my friends for Christmas. This one is going to Mom. Super easy and I love mixing up the fabric patterns. Tutorial here.
Family Rules
When I taught in the UK, my partner in Art, had this awesome mantra that the kids said when entering the room. It is genius. I use it now. It seemed like we should have Family Rules. So, saw this idea and made one of our own. Doesn't have the ring like Clyde's Art Farm rules, but I do love it. Hangs in a prominent place in our house to refer to. I did not add one important rule though....no ball playing in the house. Use your imagination. Yeah. And Mark was the ringleader!
Aaannnddd...this was made with Modge Podge. I bought some scrapbook paper that I liked, cut it to fit the printer, and printed the sayings on the paper. (I had to fiddle with the font size and type.) Then I cut the paper into strips, applied Modge Podge on a canvas (already with gesso), then put the strips down and another coat of Modge Podge. I think this could easily be done on a piece of plywood or board, too.
Saturday, June 19, 2010
Week 16
I saw this flower pin and loved it! I made another after this purple one in a thicker felt and it was just too much. This one is regular ol' felt. I love the punch it gives to anything!
Thursday, June 17, 2010
Week 15
I am so behind! I have yet to add pictures of the knitting bag and swirl scarf. Here is the latest project. I wanted to make a wrap around skirt. Ideally, reversible. Since this was my first time at trying a skirt at all, reversible would have to wait.
I visited a friend down in Bavaria a couple of weekends ago. She has the fabulous fabric store near her house. Like in biking distance. Seriously, I would be broke if I lived anywhere near there. It isn't a Joann's but it is great! I got a few 'necessities', and this fabric. I bought the yellow bias tape there as well. This skirt started as just a 6 paneled skirt with the idea of it being a pull on using fold over elastic. I tried it on and 6 panels was just waaay to full for me. I thought about adding a zipper, but I was too fearful; I have never, ever sewn one. So, I took out a seam and make it into a wrap around. I think 1 more panel would have been better, as it would have given more coverage, but it's ok the way it is. I just added the grosgrain ribbon on each side with a belt loop in the back to prevent the ribbon from riding up, and a button hole in the band to slip it through.
Overall, I am pleased the way it turned out. For a first try, not too bad.
Friday, May 28, 2010
Came, Saw, Conquered
Kelley is here! What a fabulous time with her!! She wanted to go to Italy, so....we did. She arrived early Sunday morning and by 10pm that night, we were on our way to the Eternal City! After a long lie in (she was so jet lagged), we headed to the major sights. Along the way, we met our friend Marco for a fabulous dinner and night out (ouch!), had awesome weather and laughed til our sides hurt. Everything that hanging out with your bestie should be! I will so miss her when she leaves tomorrow bright and early. So, so much!!! Give your best friend a hug and tell her how much you value her friendship and love her. I know I will be doing that with lots of tears tomorrow at the airport.
Saturday, May 22, 2010
Potential Throw Down With the Chicken Lady
Sometimes I love living in our host country. Yesterday I did not. I think that our host nationals are rude. (Who says Parisians are rude? You have never been here!) Now, my disclaimer is that not all are rude...I have made some wonderful German friends. The chicken lady is not one of them.
I was dropping a book off at a friend's house and the layout of the road was such that I could make a giant loop---her house, around the block, back to my house. So, I drop off said book, and make my way up and around toward my house. I turn on to a somewhat small-ish street and in front of me is the chicken lady. It is actually a green and gold colored van that sells eggs out of it. (At one point in time, chickens were sold too. I have no idea why they are no longer available.) The chicken lady stops. Barely pulls over and this is a narrow street, my friends. She is in front of a driveway, which is illegal for any one other than a German national. I give a friendly beep, in hopes she will scoot a little to the right, so I can pass. She does not acknowledge me. Another beep. Nothing. I feel my blood boiling. Beep. The back van doors swing open in a flourish and I am told (rather nastily) to back up and go around. I am not attempting to turn around. I ask her to move over a bit. No, and the doors slam shut. Oh, she didn't, did she?! Beep. Long pause. Beep. Long pause. Beep. Long pause. Beep. (My children's ears are burning with what I spewing from my mouth right about now.) The lady that lives in the house across the street comes out for her eggs. (Really, she could have used the quarter mile walk to the corner store.) She throws her hands up and gives me a look. Oh, that is so the last time I chit chat with her when I see her! I am starting now to practice my stink eye. Eventually, a worker who had buckets of stucco in road moves them and I proceed to go around, with no joke, mere inches next to the chicken van. If I didn't have places to go, I would have pulled in front of that chicken lady, put my car in park and waited. But, I was too chicken.
Remember Spring Break?
Spring Break seems so long ago! I realized today that I failed to update about our great vacation. I will make it short and sweet....
We cruised with our great friends to the Black Sea. Mark and I have cruised on this line before and weren't to impressed with it. We had low expectations....as long as we got from point A to point B, everything in between was a bonus; the ports were the lure.
We started out in Genoa, Italy and after spending a night in Milan with friends we boarded. The ship was small. And clientele, very geriatric. Needless to say, our group's 4 kids were the majority of the Kid's Club. So from Genoa, we sailed to Rome. How I love that city!!
Then, on to Istanbul, Turkey. Mark had been here before, but the rest of us were new. We hired a private tour guide and I didn't regret it. What an amazing city! And the Grand Bazaar...I think that I could spend days there. Although, I started to see the same thing over an over. Then on to the Ukraine; Yalta first, then Odessa. It was a really beautiful country! I really liked Odessa- it reminded me of St. Petersburg. (Odessa was Catherine the Great's summer getaway or something like that.) Big, colorful buildings and it helped that the weather was nice!
We cruised with our great friends to the Black Sea. Mark and I have cruised on this line before and weren't to impressed with it. We had low expectations....as long as we got from point A to point B, everything in between was a bonus; the ports were the lure.
We started out in Genoa, Italy and after spending a night in Milan with friends we boarded. The ship was small. And clientele, very geriatric. Needless to say, our group's 4 kids were the majority of the Kid's Club. So from Genoa, we sailed to Rome. How I love that city!!
O eating gelato in Piazza Navona
Then on to Athens. Every time we go there, I think it's our last, and inevitably, we go back.Plaka in Athens
Then, on to Istanbul, Turkey. Mark had been here before, but the rest of us were new. We hired a private tour guide and I didn't regret it. What an amazing city! And the Grand Bazaar...I think that I could spend days there. Although, I started to see the same thing over an over. Then on to the Ukraine; Yalta first, then Odessa. It was a really beautiful country! I really liked Odessa- it reminded me of St. Petersburg. (Odessa was Catherine the Great's summer getaway or something like that.) Big, colorful buildings and it helped that the weather was nice!
Church in Yalta
Boys in Odessa
Then finishing up in Sorrento...
Sweet mother of pearl, I can not find a way to upload Turkey pictures!
Boys in Odessa
Then finishing up in Sorrento...
and then to Taormina. I remember when I studied in Italy, 2 friends went to Taormina for their mid-term trip and talked about how much they loved it. I understand why. Back to Genoa then, and a long drive home.
Sweet mother of pearl, I can not find a way to upload Turkey pictures!
Sunday, May 9, 2010
Week 14
First, Happy Mother's Day to all those Moms out there. I wish I was on the same continent as my Mom to give her a big hug, take her out shopping, and have lunch together. Perhaps next year. This year, I called her and I will go upstairs to a secret box (which isn't so secret anymore) filled with old silk scarves she gave me. I have not used any of them. I kept them in that same box, because when I open it, it smells like my Mom. I love it and her. Awwwwww, gosh I miss her!
I remember at my Grandparents house, a wonderful picture that my Grandfather made. When he passed, my parents asked me if there was anything special that I wanted. I loved the picture Grandpa Ernie did. It was silhouettes of my Grandma, Grandpa and their 2 boys (my Dad and Uncle Bob). The silhouettes were made out of metal. It is great. My Mom had already taken it off the wall and put it aside for safe keeping at that time. Now, it hangs in their house. I figured it was time to do these of my boys. Of course, with paper, not metal!
So, I took profile pictures of each of the boys. The pictures are nice because the shadow really let me know what the silhouettes would look like. I didn't plan the shadow....it just worked that way.
I bought some acid free black and white paper. I printed the pictures and glued them on to the black paper with a glue stick (very little). Then I cut out both the photo and black paper at once. I then glued the silhouette onto the white paper and framed them in cheapie frames. I love the way they turned out. O's is very much him. H's is him, but not as obvious as O's. Maybe we need a family one?
Monday, April 26, 2010
Week 13-A Tutorial!
I am venturing into new territory here. I am going to post my first tutorial. So, bear with me and let's hope I get it right.
This week we are making a card holder. My wallet was becoming George Costanza-like (for all you Seinfeld fans) and I needed to pare it down. I took out all those cards you get for buying 10 books, the 11th is free and what not. It made a huge difference. But what to do with the cards? You never know when you might want to buy a paperback, and where is that darn punch card? (Now let's be real...where I live, I conveniently shop at mostly 1 place. So, it's not like I wouldn't be back at the same store the next day with said punch card that I left at home. But anyway....this is a handy dandy thing to have on hand!) So, here goes....
In my typical fashion, I eyeball a lot. A LOT! So, for seam allowances, when I sewed the pockets on, I sewed very close to the edge. When I sewed the inside/outside pieces together, I sewed a little further from the edge. That's as good as a seam allowance guesstimate your gonna get here!
Step 1:
Iron the pocket pieces in half and iron the interfacing onto the wrong side of one of the inside/outside pieces (polka dots in the pictures).
Step 2:
Sew the pockets on to the polka dot piece you just lined. Sew the pockets at the end of each short side with the folded edge facing the middle.
Step 3:
With wrong sides together, sew the other inside/outside piece to the one with the pockets. The pockets will be inside. I think it's easiest to start sewing on the long side, right where the pocket starts. Sew around and stop at the top of the other pocket, this leaves an opening to turn the wallet right side out. Clip the corners so that it will lay better.
Step 4:
Turn wallet right side out and iron flat. You will want to iron the opening edges in; it makes the next step easier.
Step 5:
Topstitch around the entire thing.
Step 6:
Fold it in half and give another once over with the iron.
Easy peasy lemon squeasy! Honestly, I think it took me all of 20 minutes to do and a great way to use those odd pieces of your favorite material!
And since this is my first tutorial, if I have left anything out, please let me know.
This week we are making a card holder. My wallet was becoming George Costanza-like (for all you Seinfeld fans) and I needed to pare it down. I took out all those cards you get for buying 10 books, the 11th is free and what not. It made a huge difference. But what to do with the cards? You never know when you might want to buy a paperback, and where is that darn punch card? (Now let's be real...where I live, I conveniently shop at mostly 1 place. So, it's not like I wouldn't be back at the same store the next day with said punch card that I left at home. But anyway....this is a handy dandy thing to have on hand!) So, here goes....
- You will need 2 pieces of material for the outside and inside, but cut to 4.5" x 6.5".
- You will also need interfacing cut to the same dimensions. I use what I have on hand (great stash buster project), but if you are buying interfacing, go with the heavier stuff. Not the fluffy stuff, which is what I had for this particular one.
- You will also need 2 pieces of material cut to 4.5" x 4.5" for the pockets.
- And, of course, thread, iron, sewing machine.
In my typical fashion, I eyeball a lot. A LOT! So, for seam allowances, when I sewed the pockets on, I sewed very close to the edge. When I sewed the inside/outside pieces together, I sewed a little further from the edge. That's as good as a seam allowance guesstimate your gonna get here!
Step 1:
Iron the pocket pieces in half and iron the interfacing onto the wrong side of one of the inside/outside pieces (polka dots in the pictures).
Step 2:
Sew the pockets on to the polka dot piece you just lined. Sew the pockets at the end of each short side with the folded edge facing the middle.
Step 3:
With wrong sides together, sew the other inside/outside piece to the one with the pockets. The pockets will be inside. I think it's easiest to start sewing on the long side, right where the pocket starts. Sew around and stop at the top of the other pocket, this leaves an opening to turn the wallet right side out. Clip the corners so that it will lay better.
Step 4:
Turn wallet right side out and iron flat. You will want to iron the opening edges in; it makes the next step easier.
Step 5:
Topstitch around the entire thing.
Step 6:
Fold it in half and give another once over with the iron.
Easy peasy lemon squeasy! Honestly, I think it took me all of 20 minutes to do and a great way to use those odd pieces of your favorite material!
And since this is my first tutorial, if I have left anything out, please let me know.
Friday, April 23, 2010
Week 12
I am reeeaaaallly behind on this 52 Weeks, 52 Projects thing. I have been creating, but just don't take the time to photograph what I have done. We recently bought a new camera. I think I need to pry the old one out of the hands of our budding photographer, H, and keep it in my craft area! Anyway, I will update with a project, but there is so much more to add in another post.
Here is a scrappy scarf that I made. Really very easy. I cut all the pieces the same rectangle shape, arranged the patterns the way I liked them (front and back), then sewed them together. Once it was turned right side out (the hardest part), I topstitched it. I loved how it turned out and I think it's a great piece with my new Boden jacket. (Birthday gift from my wonderful husband!) Each rectangle was about 3 inches wide, and maybe 6 inches long. I am guessing here. I had no formula or pattern, just winged it in my typical style.
I think I may try a tutorial next.
Here is a scrappy scarf that I made. Really very easy. I cut all the pieces the same rectangle shape, arranged the patterns the way I liked them (front and back), then sewed them together. Once it was turned right side out (the hardest part), I topstitched it. I loved how it turned out and I think it's a great piece with my new Boden jacket. (Birthday gift from my wonderful husband!) Each rectangle was about 3 inches wide, and maybe 6 inches long. I am guessing here. I had no formula or pattern, just winged it in my typical style.
I think I may try a tutorial next.
Sunday, April 4, 2010
Week 11
Falling behind....
I'm still working on a project a week, but I forget to take photos and never get to posting the projects. This is a great way to dress up a t-shirt. I found the tutorial here.
I bought 2 inexpensive t-shirts, same color. Using one of them, I cut heart shapes. The hearts were about 2-2.5 inches in the middle, vertically, to give you an idea of how big they were. I cut out a bunch and wasn't too picky about how perfect they were or were not. Then, I sewed them onto the tee at the neckline. I used my sewing machine and just did a quick stitch right in the middle of the heart. A quick back and forth and that's it! I didn't place the pieces before I stitched. I just sewed one, then eyeballed where another should go, then sewed that one. The closer they are together, the fuller the embellishment. I can't wait for the weather to warm up to wear it!
We are leaving on Tuesday for vacation. We are driving through Milan to see a friend, then on to cruising. We are heading to Athens and Rome again (fave!!), then to the big sights I want to see; Istanbul and the Black Sea (Ukraine). There are a few other stops in there, but these are my highlights. Hopefully the weather will be warm-ish, and the cruise will be decent! And, O is big enough to join the Kids Club!!
Saturday, March 20, 2010
Week 10
Still catching up...
Our dear friends from the UK came by for the night. Every time Gwen and I get together, we inevitably make something. This time, I showed her an ipod stand that I saw on Etsy. We batted around ideas on how it was made. Gwen was ready to go home and make a pattern from a PG Tips tea bag. Then it came to her. My machine was set up and ready to go, so we made a few prototypes and eventually came up with what we wanted. Check it out. Super simple!
Tuesday, March 9, 2010
Week 9
The Brown family going away gift was pretty special, if you ask me. I took pictures of letters that are in different places around our village. The B is from the local backerei (bakery), R from our favorite restaurant.....you get the drift. I would hope that our friends look back on the places they have driven past or been to these past couple of years with fond memories. We sure will miss them!
A Rough Week
I am a little behind in the crafting department. Last week was one of the hardest weeks of my life.
Tuesday, our dear friends moved back to the States. How I will miss Claudia's laugh and our easy conversations. She has a wicked sense of humor and is the life of any party!
Thursday, by far, the hardest day of my life, thus far. Our dear Gracie girl died. I am still grieving for my first baby. It sounds ridiculous, but she was my Gracie Girl. She died peacefully that afternoon. I don't wish this situation on my worst enemy. My heart hurts and I miss her dearly. She was an old girl, and just slept most of the day, but I miss the jingling of her tags, her velvet ears, her chestnut brown eyes, her purring noise when she stretched and a million other things. A coworker gave me "Dog Heaven" by Cynthia Rowland to read to Henry. It was a sweet book. A part of the book mentioned that Angel Children walk the Angel Dogs back to earth so they can check up on their families. Mark made me feel good the other day. He said he sometimes sees her in the corner or basking in the ray of sun that comes in through the front window. An Angel Child must be walking our girl. She is checking up on us to make sure we are ok. I like to think that- it comforts me.
And to finish the horrible week, Mark had shoulder surgery. He was a star patient and is now comfortably recovering at home.
So forgive me if I am a few weeks behind. Life is throwing some curve balls and I'm not a good ball player.
Saturday, February 27, 2010
Week 8
Baby gift 2. Another coworker had a baby at the beginning of January. I finally got my act together and finished up her baby gift. I was under a deadline, as this week was the first time I saw her since her maternity leave. Here is the final product. These canvases are about 5x7 and they spell her daughter's name. I don't like how the ribbon came out when they are flat; kind of arched. But, once they are hung (I figured on a peg or even a white, round drawer pull) they come to a point and look better. I printed a font that I liked, then transferred it onto the canvas (which was already primed). In acrylic paint, the background is pastel colors of the nursery, the letters brown and the stuff on the letters is in cream. I was pleased with how they eventually turned out.
Friday, February 12, 2010
Fasching 2010
O's Kindergarten celebrated Fasching (Mardi Gras) on Thursday. Each classroom had a theme. O's was Snow White and the 7 Dwarfs. (I am not going to attempt to translate that into German. I do know that dwarf is zwerge, since I have been hearing O say it. Alot!) My first question was how do I made my 3 foot child look like a dwarf? Seems redundant to me. I went to the Thrift Shop and bought a pair of pants, shirt and belt figuring I could do something with that. I cut the pants, he wore strumpfhosen underneath them (sweater type tights that every German child wears, I believe), belted the shirt, crafted a hat out of the material I bought for H's Yoda Halloween costume and finally, made a beard and mustache. I just hot glued cotton balls onto pipe cleaners for the facial hair. O loved it, but was camera shy when it came to showing off the outfit. He even kept it on at home. Not bad for my $3.50 'custoon' as O calls it.
Owen not happy about showing his zwerge self....
And the only men in the house with facial hair at this time (at least for a few hours)...
Owen not happy about showing his zwerge self....
And the only men in the house with facial hair at this time (at least for a few hours)...
Week 7
I am heading out to Berlin for a Girls Weekend, so thought I would add Week 7's project.
I am diligently working on a project for a teacher friend. She wanted seat back pockets. They are tricky to figure out. So, the next week will be spend perfecting them. (They may count for a few weeks. My brain is quivering with all the math I've been doing!)
Anyway, the fabulous Cristina told me about these little beauties that she is creating from her stash of yarn. They are so easy! I whipped a few up to give to H's teacher for Valentines Day. We had off today (yahoo!), and the kids don't head back until Wednesday because of a Teacher Workday. So she won't get them for a bit. I made them into pins and thought it would be sweet to pin them to a card with the saying, "Thank you for helping me blossom." The yarn that I used came from England. When I worked there, I set up a visiting artist that came and showed the students all about fiber art. She got the wool from a farmer in Scotland, I believe. Then she washed, carded, dyed it. All by hand. I find that amazing! She had extra that she passed along. The yarn is variegated and just beautiful to touch. The only down side is that Cristina came over today and saw the blossoms. (She was proud of her student, I hope!) She tried on the blue on and it is simply too heavy to wear. I think that I will have to take the pin back off and keep the flower for a bag or something else that I can actually sew it to. It just droops as a pin. But the pink ones are darling on! I just finished a greenish one too. They are quick, easy and fun. Though the weather is snowy, I may be coming back from my very long train ride with alot of flowers!
Week 6
I needed to add to the baby shower gift for a colleague. I decided to make some burp cloths. I had to improvise and buy regular flannel receiving blankets as backing. I cut them and doubled them up, then added some lovely Kaffe Fassett fabric on the opposite side. Sewed all 3 (2 layers flannel and fabric) together, turned right side out, then zig-zag stitched around the outside. I think they turned out great. They are long and thin, so in a pinch, could even be used as a changing pad. The colors didn't turn out as great as in person. The flannel is lilac and pink. They look pretty washed out in the pictures. But you get the idea, right?
Tuesday, February 9, 2010
Week 5
These fingerless gloves have been around our house for a while. When my dear friend Cristina moved to town, being the pro knitter she is, she got all the girls to hop on to the knitting wagon. I learned in England from my awesome friend and neighbor, Susan. Unfortunately, once we moved, I seemed to forget everything she taught me. Cristina picked up as my fabulous, patient tutor. This was the first project that I started. These are for my niece, Megan. I love the colors. They aren't perfect, but they are made with love.
Subscribe to:
Posts (Atom)